As an administrator learn how to setup your Location details such as your Company's logo, icon, info, and address. After location setup, learn how to invite and manage users.
- Create Locations and add location details (e.g. logo, address)
- Customize branch branding and templates by selecting what pages and fields to default (e.g. cover page, table of contents)
- Invite and modify users and their access to locations
Upload your Company Logo
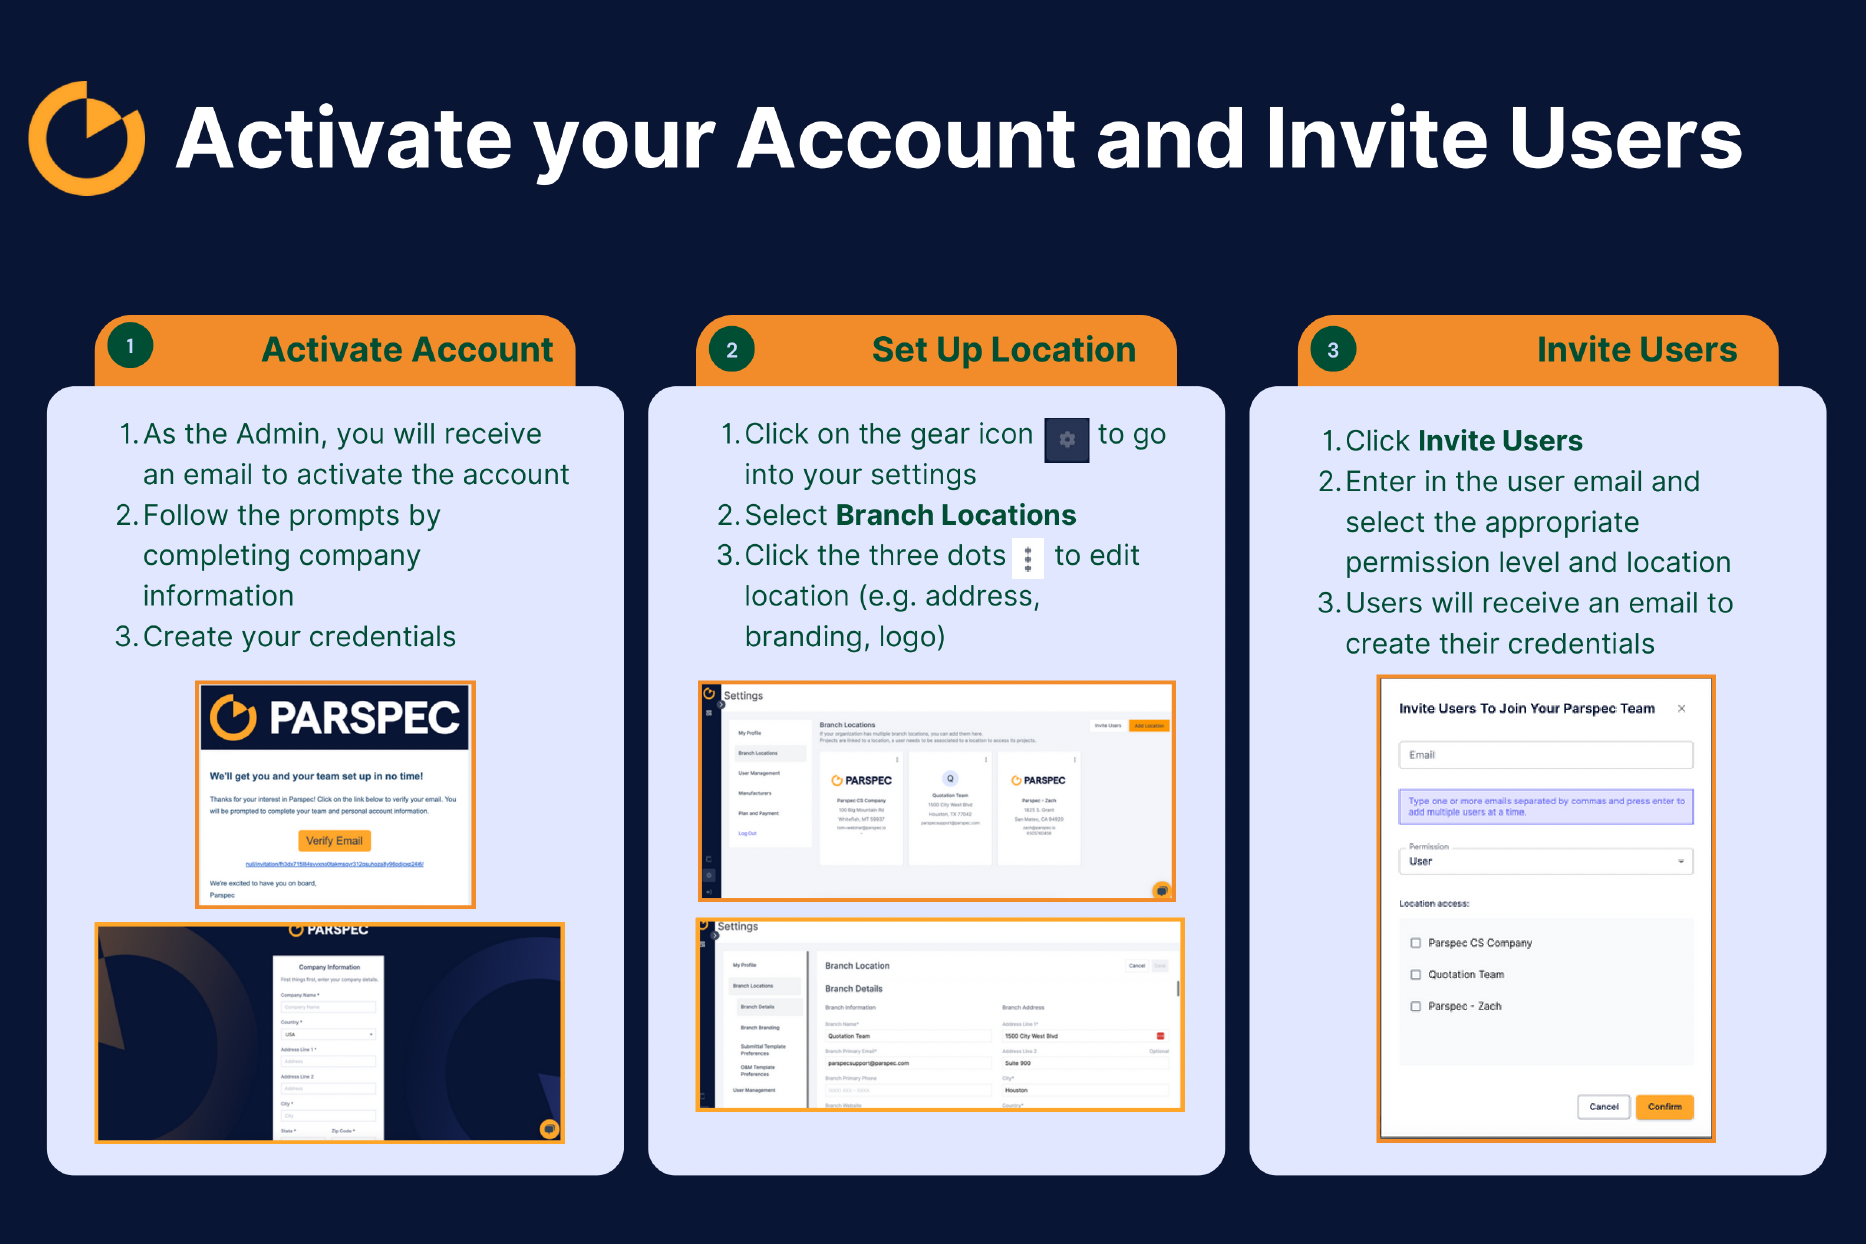
The following steps will show you how to upload and save your chosen default logo, icon, and team information in the Branch Locations section of your settings so newly created submittals will have defaults to these images/info.
- From your Dashboard, navigate to the Settings tab by clicking on the gear icon
 in the bottom left of the screen
 - Once there, select Branch Locations
- Select the Edit Location by clicking on the three vertical dots of the Location
- Upload a file to the Company Logo with the image (you are able to upload a primary and secondary logo)
- Update the Team Address and Information sections with relevant data specific to your team that you might want to include on the submittal